In the series of article related to SSO integration with Spring Boot Security, this is the third article where we are going to use SAML for SSO communication. We will be using SAML2 with Spring Boot 3 and Spring Security 6 and create a sample login application. First we will implement SSO SAML with degault behavious provided by Spring Security to secure the API and then override the default behaviour of it and customize the Spring Security SAML2 auth process.
In the next article we will upgrade this application to use JWT token based authentication mechanism on top of this post SSO login.
Instead of simply using the default SAML2 Spring config withDefaults(), we will try to customize the configuration as per IDP metadata and develop a custom mechanism to validate InResponseTO SAML attributes so that this tutorial can provide a base to integrate SAML at an industry level.
SSO and SAML
SSO or Single Sign-on is an authentication mechanism which allow users to login into a service once and access other multiple services without re-entering authentication details again. So, in this authentication mechanism there are always 2 systems involved - one is Identity Provider(IDP) such as Google and the other is the external app called Service Provider such as this website Devglan.
Now the question comes how this IDP and SP communicates in between and this communication can happen based on 2 protocols - one is SAML(Security Assertion Markup Language) and the other is OIDC(OpenID Connect).
If you remember, we have already integrated OIDC based SSO authentication with Google in my previous articles and here we are going to use SAML based SSO authentication with Spring Boot Security. All those articles on spring security can be found here.
Project Structure
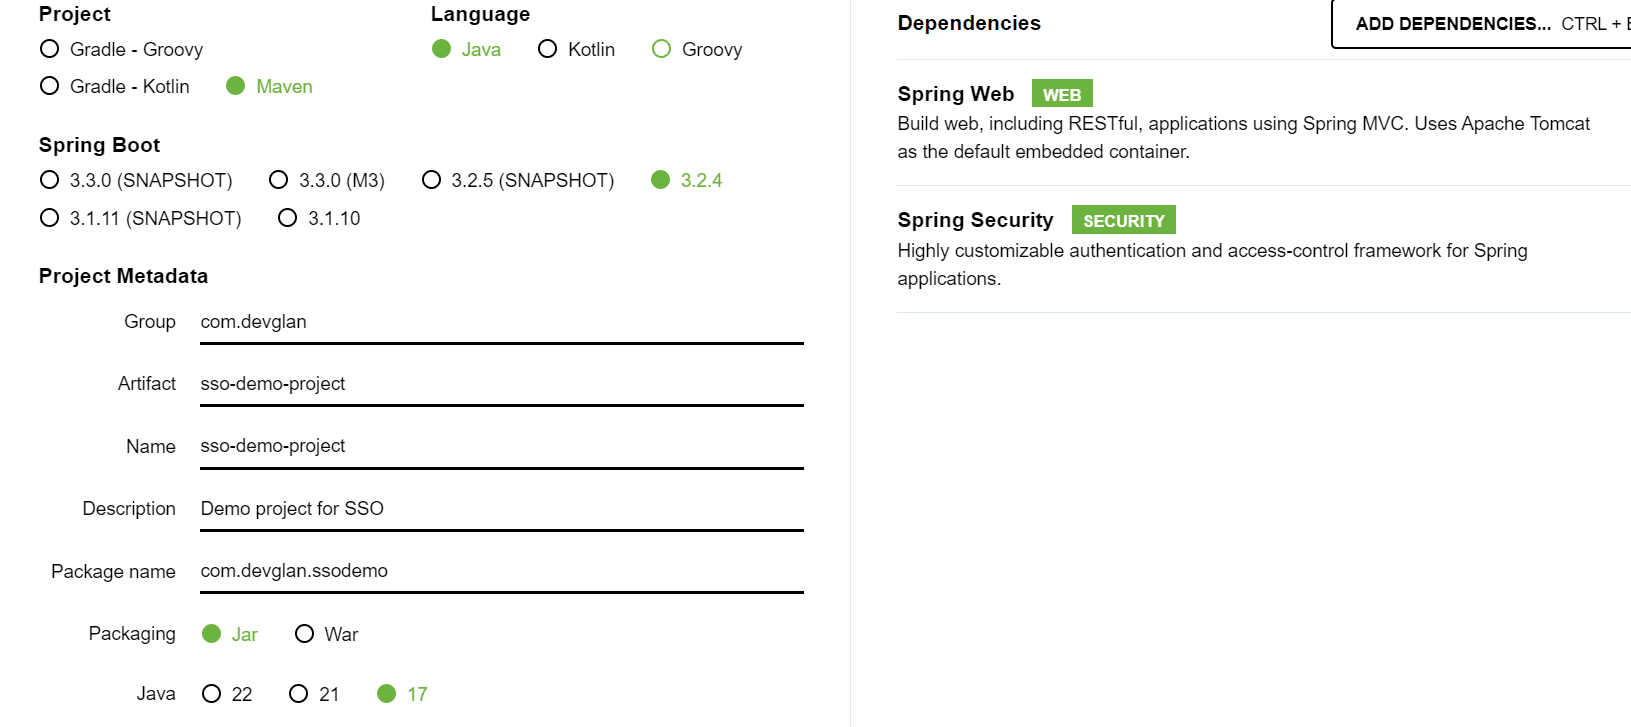
Head over to https://start.spring.io to generate a sample spring boot 3 project with required dependencies.

Below is the final project structure of the app that we will be building at the end of this article.

On top of this, we need to add below spring security saml2 provider maven dependency to support SAML2.
<dependency>
    <groupId>org.springframework.security</groupId>
    <artifactId>spring-security-saml2-service-provider</artifactId>
</dependency>
Spring Security SAML2 Default Config
Below is a default configuration of SAML2 as per spring security official documentation and it's just few lines of configuration. Let's try to understand it first and then we will implement SAML2 with our custom configuration.
application.ymlspring: #default spring security config security: saml2: relyingparty: registration: demo: identityprovider: entity-id: https://idp.example.com/issuer verification.credentials: - certificate-location: "classpath:idp.crt" singlesignon.url: https://idp.example.com/issuer/sso singlesignon.sign-request: false
Above is the configuration for relying party i.e. service provider. Here
classpath:idp.crtis the location of the identity provider’s certificate on the classpath for verifying SAML responses from IDP
idp.example.com/issuer/sso is the endpoint of the IDP where the SP will make the AuthnRequest. The will AuthnRequest will be prepared by spring internally.
Similarly, the SP processes any POST /login/saml2/sso/{registrationId} request containing a SAMLResponse parameter coming from IDP post authentication. Here {registrationId} will be replaced by demo as per the configuration.
POST /login/saml2/sso/demo HTTP/1.1

SAMLResponse=PD94bWwgdmVyc2lvbj0iMS4wIiBlbmNvZGluZ...
The SAML2 authentication is now done and for this just add .saml2Login(withDefaults()) configuration in your Security config java class.
Customizing Spring Security SAML2
Now, let us customize the the default behaviour. We don't want spring to use non-default response endpoint and we want to configure the relay part or SP using RelyingPartyRegistrationRepository.
IDP Metadata Configuration
Let's download a random IDP metadata XML file from the web and try to configure it in our application. Below is the IDP metadata downloaded from above URL.
<EntityDescriptor
        ID="_c066524f-ba36-49d5-9dfa-ae14e13c1392"
        entityID="https://idp.identityserver"
        validUntil="2024-07-20T09:48:54Z"
        cacheDuration="PT15M"
        xmlns="urn:oasis:names:tc:SAML:2.0:metadata"
        xmlns:saml2="urn:oasis:names:tc:SAML:2.0:assertion">

    <IDPSSODescriptor WantAuthnRequestsSigned="true" protocolSupportEnumeration="urn:oasis:names:tc:SAML:2.0:protocol">
        <SingleSignOnService Binding="urn:oasis:names:tc:SAML:2.0:bindings:HTTP-Redirect" Location="https://idp.identityserver/saml/sso" />
        <SingleSignOnService Binding="urn:oasis:names:tc:SAML:2.0:bindings:HTTP-POST" Location="https://idp.identityserver/saml/sso" />
        <SingleSignOnService Binding="urn:oasis:names:tc:SAML:2.0:bindings:HTTP-Artifact" Location="https://idp.identityserver/saml/sso" />

        <SingleLogoutService Binding="urn:oasis:names:tc:SAML:2.0:bindings:HTTP-Redirect" Location="https://idp.identityserver/saml/slo" />
        <SingleLogoutService Binding="urn:oasis:names:tc:SAML:2.0:bindings:HTTP-POST" Location="https://idp.identityserver/saml/slo" />
        <SingleLogoutService Binding="urn:oasis:names:tc:SAML:2.0:bindings:HTTP-Artifact" Location="https://idp.identityserver/saml/slo" />

        <ArtifactResolutionService Binding="urn:oasis:names:tc:SAML:2.0:bindings:SOAP" Location="https://idp.identityserver/saml/ars" index="0" />

        <NameIDFormat>urn:oasis:names:tc:SAML:1.1:nameid-format:unspecified</NameIDFormat>
        <NameIDFormat>urn:oasis:names:tc:SAML:2.0:nameid-format:transient</NameIDFormat>
        <NameIDFormat>urn:oasis:names:tc:SAML:2.0:nameid-format:persistent</NameIDFormat>
        <NameIDFormat>urn:oasis:names:tc:SAML:1.1:nameid-format:emailAddress</NameIDFormat>

        <KeyDescriptor use="signing">
            <KeyInfo
                    xmlns="http://www.w3.org/2000/09/xmldsig#">
                <X509Data>
                    <X509Certificate>IDP_PUBLIC_SIGNING_CERTIFICATE_USED_FOR_SIGNING_RESPONSES</X509Certificate>
                </X509Data>
            </KeyInfo>
        </KeyDescriptor>
    </IDPSSODescriptor>

</EntityDescriptor>
Few important tags to note here are entityID, SingleSignOnService Binding="urn:oasis:names:tc:SAML:2.0:bindings:HTTP-POST", SingleLogoutService Binding="urn:oasis:names:tc:SAML:2.0:bindings:HTTP-POST" and X509Certificate.
Spring by default reads this IDP metadata file and generates the required AuthnRequest so we don't have to worry much about this but we need to tell Spriing the location of this file. Let's configure it first in application.yml
devglan:
  saml:
    metadataLocation: /saml/idp-metadata.xml
    assertingParty:
      entityId: https://idp.identityserver
      serviceLocation: https://idp.identityserver/saml/sso
Based on the IDP metadata, we have configured other attributes such as entityId, serviceLocation and we have placed this file under location /saml/idp-metadata.xml with name idp-metadata.xml
SP Metadata Configuration
Now, let us configure the SP metadata.
application.yml
    relyingParty:
      registrationId: devglan123
      entityId: devglanmetadata
      baseUrl: https://www.devglan.com/
      redirectUrl: ${devglan.saml.relyingParty.baseUrl}/SSO/mysamlresponse
Here, we have configured our custom redirectURL and registration id too. One thing to note here is the default redirect URL is login/saml2/sso/{registrationId} which we want to avoid. Here, we have defined it as SSO/mysamlresponse.
devglan:
  saml:
    metadataLocation: /saml/idp-metadata.xml
    assertingParty:
      entityId: https://idp.identityserver
      serviceLocation: https://idp.identityserver/saml/sso
    relyingParty:
      registrationId: devglan123
      entityId: devglanmetadata
      baseUrl: https://www.devglan.com/
      redirectUrl: ${devglan.saml.relyingParty.baseUrl}/SSO/mysamlresponse
Customizing SAML2 Relay Party registration
Now, let us use these attributes defined in application.yml file to override the default behavious of Spring Security SAML2 authentication mechanism.
WebSecurityConfig.java@Bean public RelyingPartyRegistrationRepository relyingPartyRegistration() { RelyingPartyRegistration registration = RelyingPartyRegistrations.fromMetadataLocation(samlProperties.getMetadataLocation()) .registrationId(samlProperties.getRelyingParty().getRegistrationId()) .entityId(samlProperties.getRelyingParty().getEntityId()) .assertionConsumerServiceLocation(samlProperties.getRelyingParty().getRedirectUrl()) .assertingPartyDetails(party -> party.entityId(samlProperties.getAssertingpParty().getEntityId()) .wantAuthnRequestsSigned(false) .singleSignOnServiceLocation(samlProperties.getAssertingpParty().getServiceLocation()) .singleSignOnServiceBinding(Saml2MessageBinding.POST)) .build(); return new InMemoryRelyingPartyRegistrationRepository(registration); }
Here we have configured all our SAML2 related atributes defined in the application.yml file. You can configure multiple RelyingPartyRegistration here.
fromMetadataLocation() is the classpath location of IDP metadata xml file.
assertionConsumerServiceLocation() is the endpoint where the IDP will send the <saml2:Response> which is by default login/saml2/sso/{registrationId} and it is mapped to Saml2WebSsoAuthenticationFilter in the filter chain by default.
singleSignOnServiceLocation is the IDP endpoint where the <saml2:AuthnRequest> will be posted.
We have still not overriden the
Spring Security SAML2 Configuration
Now, let us configure our Spring SecurityFilterChain to consider above RelyingPartyRegistrationRepository instead of default SAML2 configuration.
WebSecurityConfig.java@Bean public SecurityFilterChain filterChain(HttpSecurity http) throws Exception { http .cors(AbstractHttpConfigurer::disable) .csrf(AbstractHttpConfigurer::disable) .authorizeHttpRequests(auth -> auth.anyRequest().authenticated()) .saml2Login(saml2 -> saml2.loginProcessingUrl("/SSO/mysamlresponse") .failureHandler(authenticationFailureHandler()) .relyingPartyRegistrationRepository(relyingPartyRegistration())); return http.build(); }
Above is very basic configuration to test SAML2. We can enhance it by configuring successHandler, failureHandler and adding custom filters to deal with the generation of custom JWT token post SAML login. We will implemen this part in the next article.
The loginProcessingUrl() is called by the asserting party after the authentication succeeds, which contains in the request the SAMLResponse parameter. We have customised it instead of using the default one whose mplementation relies on the {registrationId} path variable present in the URL.
Below is the SamlProperties.java class definition.
@Data
@Configuration
@ConfigurationProperties(prefix = "devglan.saml")
public class SamlProperties {

    private String metadataLocation;
    private RelyingParty relyingParty;
    private AssertingParty assertingpParty;

    @Data
    public static class RelyingParty {
        private String registrationId;
        private String entityId;
        private String baseUrl;
        private String redirectUrl;
    }

    @Data
    public static class AssertingParty {
        private String entityId;
        private String serviceLocation;
    }

}
SAML2 InResponseTo Validation
With spring security SAML2 a mandatory validation of InResponseTo was introduced and the validation logic expects to find saved Saml2AuthenticationRequest in HttpSession by default. But that is not always possible such as if SameSite attribute is set or the Spring Boot app is working behind a load balancer. In such cases, we need to have a custom implementation to validate the InResponseTo.
Setting storageFactory to org.springframework.security.saml.storage.EmptyStorageFactory will not help to disable the check of the InResponseToField and can't avoid below errors.
org.opensaml.common.SAMLException: InResponseToField of the Response doesn't correspond to sent message
SavedRequest not retrieved (cannot redirect to requested page after authentication / InResponseTo exception
Spring security saml2 provider: InResponseTo validation for saml2 executed even if saved request is not found
Below is a custom implementation of Saml2AuthenticationRequestRepository which saves the SAML request in database based on RelayState parameter and validates the InResponseTo based on RelayState parameter.
CustomSaml2AuthenticationRequestConfig.java@Slf4j public class CustomSaml2AuthenticationRequestConfig implements Saml2AuthenticationRequestRepository{ private static final String SAML2_REQUEST_COLLECTION = "saml2_requests"; @Autowired private MongoTemplate mongoTemplate; @Override public AbstractSaml2AuthenticationRequest loadAuthenticationRequest(HttpServletRequest request) { String relayState = request.getParameter(Saml2ParameterNames.RELAY_STATE); if (!StringUtils.hasText(relayState)) { log.error("Relay state is null. Aborting...."); return null; } Query query = Query.query(Criteria.where("relayState").is(relayState));; AbstractSaml2AuthenticationRequest authenticationRequest = mongoTemplate.findOne(query, AbstractSaml2AuthenticationRequest.class, SAML2_REQUEST_COLLECTION); if (Objects.isNull(authenticationRequest)) { log.error("Couldn't find any saved authentication request for relay state {}", relayState); return null; } return authenticationRequest; } @Override public void saveAuthenticationRequest(AbstractSaml2AuthenticationRequest authenticationRequest, HttpServletRequest request, HttpServletResponse response) { mongoTemplate.save(authenticationRequest, SAML2_REQUEST_COLLECTION); } @Override public AbstractSaml2AuthenticationRequest removeAuthenticationRequest(HttpServletRequest request, HttpServletResponse response) { AbstractSaml2AuthenticationRequest authRequest = loadAuthenticationRequest(request); if (Objects.nonNull(authRequest)) { mongoTemplate.remove(authRequest, SAML2_REQUEST_COLLECTION); } return authRequest; } }
You can hit this URL {baseUrl}/saml2/authenticate/{registrationId}to check the SAML flow in spring security SAML2 implementation.
Conclusion
In this article, we created an example application using Spring Security 6 and SAML2. First, we implemented SSO SAML2 based authentication with degault behavious provided by Spring Security and then override the default behaviour of it and customized the Spring Security SAML2 auth process.


