In this post, let us discuss about auhtenticating user present in database using spring security with form login feature.We will be defining our custom UserDetailService and hibernate with integration to spring to connect to the database. We will continue to use spring boot features similar to previous posts to avoid common configurations.By using spring security we will ensure that our app is secured against Cross Site Request Forgery (CSRF) attacks.In this app also we will have similar configurations as my previos post of Spring security Custom Form Login Example.
Table of Contents
1. Environment Setup
2. Maven Dependencies
3. Project Structure
4. Spring Bean Configuration
5. Configuring Hikari Datasource
6. Hibernate Implementation
7. Client Side Implementation
8. DB Configurations
9. Run Application
Environment Setup
1. JDK 8 2. Spring Boot 3. Intellij Idea/ eclipse 4. Maven
Maven Dependencies
spring-boot-starter-parent: provides useful Maven defaults. It also provides a dependency-management section so that you can omit version tags for existing dependencies.
spring-boot-starter-web: includes all the dependencies required to create a web app. This will avoid lining up different spring common project versions.
spring-boot-starter-tomcat: enable an embedded Apache Tomcat 7 instance, by default. We have overriden this by defining our version. This can be also marked as provided if you wish to deploy the war to any other standalone tomcat.
tomcat-embed-jasper: provides support for .jsp file rendering.
spring-boot-starter-security: take care of all the required dependencies related to spring security.
    <properties>
        <tomcat.version>8.0.3</tomcat.version>
		<start-class>spring-boot-example.Application</start-class>
    </properties>

	<parent>
        <groupId>org.springframework.boot</groupId>
        <artifactId>spring-boot-starter-parent</artifactId>
        <version>1.3.3.RELEASE</version>
    </parent>

    <dependencies>
		<dependency>
            <groupId>org.springframework.boot</groupId>
            <artifactId>spring-boot-starter-web</artifactId>
        </dependency>
		<dependency>
            <groupId>org.springframework.boot</groupId>
            <artifactId>spring-boot-starter-tomcat</artifactId>
			<!--<scope>provided</scope>-->
        </dependency>
		<dependency>
            <groupId>org.springframework.boot</groupId>
            <artifactId>spring-boot-starter-security</artifactId>
		</dependency>
		<dependency>
            <groupId>javax.servlet</groupId>
            <artifactId>jstl</artifactId>
		</dependency>
		<dependency>
            <groupId>org.apache.tomcat.embed</groupId>
            <artifactId>tomcat-embed-jasper</artifactId>
		</dependency>
		<dependency>
            <groupId>org.springframework.boot</groupId>
            <artifactId>spring-boot-starter-data-jpa</artifactId>
		</dependency>
		<dependency>
            <groupId>commons-dbcp</groupId>
            <artifactId>commons-dbcp</artifactId>
		</dependency>

    </dependencies>
Project Structure

 Other Interesting Posts
AES Encryption and Decryption in Java
Spring Security Password Encoding using Bcrypt Encoder
Spring 5 Features and Enhancements
Spring Boot Security Redirect after Login with complete JavaConfig
Securing REST API with Spring Security Basic Authentication
Spring Boot Security Custom Form Login Example
Spring JMS Activemq Integration with Spring Boot
Websocket spring Boot Integration without STOMP with complete JavaConfig
Maintaining Spring Session during Websocket Connection
Spring MVC Angularjs Integration with complete JavaConfig
Spring Hibernate Integration with complete JavaConfig
Spring Junit Integration with complete JavaConfig
Spring Ehcache Cacheable Example with complete javaConfig
Spring Boot Spring MVC Example
Spring Boot Thymeleaf Example
Spring Bean Configuration
SpringBootServletInitializer enables process used in Servlet 3.0 using web.xml
@SpringBootApplication: This is a convenience annotation that is equivalent to declaring @Configuration,
@EnableAutoConfiguration and @ComponentScan.
package com.developerstack.config; import org.springframework.boot.SpringApplication; import org.springframework.boot.context.web.SpringBootServletInitializer; import org.springframework.context.annotation.ComponentScan; import org.springframework.boot.autoconfigure.SpringBootApplication; @ComponentScan(basePackages = "com.developerstack") @SpringBootApplication public class Application extends SpringBootServletInitializer { private static ClassapplicationClass = Application.class; public static void main(String[] args) { SpringApplication.run(Application.class, args); } }
Now let us define our main configuration for spring security - SpringSecurityConfig.java.Here we have autowired our service class UserDetailsService.javawhich in turn will get the user details present in the database.In the mean time, we have also made configuration to secure our authentication process with CSRF attack.
package com.developerstack.config;

import org.springframework.beans.factory.annotation.Autowired;
import org.springframework.context.annotation.Configuration;
import org.springframework.security.config.annotation.authentication.builders.AuthenticationManagerBuilder;
import org.springframework.security.config.annotation.web.builders.HttpSecurity;
import org.springframework.security.config.annotation.web.builders.WebSecurity;
import org.springframework.security.config.annotation.web.configuration.EnableWebSecurity;
import org.springframework.security.config.annotation.web.configuration.WebSecurityConfigurerAdapter;
import org.springframework.security.web.util.matcher.AntPathRequestMatcher;

@Configuration
@EnableWebSecurity
public class SpringSecurityConfig extends WebSecurityConfigurerAdapter {

	@Resource(name = "userDetailService")
	private UserDetailsService userDetailsService;

	@Override
	protected void configure(HttpSecurity http) throws Exception {
		http.csrf().requireCsrfProtectionMatcher(new AntPathRequestMatcher("**/login")).and().authorizeRequests()
				.antMatchers("/dashboard").hasRole("USER").and().formLogin().defaultSuccessUrl("/dashboard")
				.loginPage("/login").and().logout().permitAll();
	}

	@Autowired
	public void configureGlobal(AuthenticationManagerBuilder auth) throws Exception {
		auth.userDetailsService(userDetailsService);
	}

	@Override
	public void configure(WebSecurity web) throws Exception {
		web.ignoring().antMatchers("/*.css");
		web.ignoring().antMatchers("/*.js");
	}
}
This is the class which is reponsible to update the spring security context with valid user and the corresponding role.
SpringSecurityConfig.javapackage com.developerstack.service.impl; import java.util.Arrays; import java.util.List; import org.springframework.beans.factory.annotation.Autowired; import org.springframework.security.core.authority.SimpleGrantedAuthority; import org.springframework.security.core.userdetails.UserDetails; import org.springframework.security.core.userdetails.UserDetailsService; import org.springframework.security.core.userdetails.UsernameNotFoundException; import org.springframework.stereotype.Component; import com.developerstack.dao.UserDao; import com.developerstack.service.UserService; @Component(value = "userDetailService") public class UserDetailServiceImpl implements UserDetailsService, UserService{ @Autowired private UserDao userDao; public UserDetails loadUserByUsername(String email) throws UsernameNotFoundException { com.developerstack.model.UserDetails user = userDao.findUserById(userId); if(user == null){ throw new UsernameNotFoundException("Invalid username or password."); } return new org.springframework.security.core.userdetails.User(user.getId(), user.getPassword(), getAuthority()); } private ListgetAuthority() { return Arrays.asList(new SimpleGrantedAuthority("ROLE_USER")); } public List getUsers() { return userDao.getUserDetails(); } }
Configuring Hikari Datasource
In the BeanConfig.java in the source code we configured BasicDatasource for connection pooling but there are advanced options too for connection pooling.HikariDatasource is one of the option. It provides many advanced features while configuring our datasource in comparison to other datasources such as connectionTimeout, idleTimeout, maxLifetime, connectionTestQuery, maximumPoolSize and very important one is leakDetectionThreshold.It is as advanced as detecting connection leaks by itself.It is also faster and lighter than other available datasource.Following is the java configuration for HikariDatasource.In production environment you must use this advanced connection pooling.
@Bean
    public DataSource dataSource() {
        HikariDataSource ds = new HikariDataSource();
        ds.setMaximumPoolSize(100);
        ds.setDataSourceClassName("com.mysql.jdbc.jdbc2.optional.MysqlDataSource");
        ds.addDataSourceProperty("url", "jdbc:mysql://localhost:3306/test");
        ds.addDataSourceProperty("user", "root");
        ds.addDataSourceProperty("password", "password");
        ds.addDataSourceProperty("cachePrepStmts", true);
        ds.addDataSourceProperty("prepStmtCacheSize", 250);
        ds.addDataSourceProperty("prepStmtCacheSqlLimit", 2048);
        ds.addDataSourceProperty("useServerPrepStmts", true);
        return ds;
    }
In order to use HikariDataSource, you must include following maven dependency. Checkout the latest version here - Hikari Maven
<dependency>
            <groupId>com.zaxxer</groupId>
            <artifactId>HikariCP</artifactId>
			<version>2.7.3</version>
			</dependency>
Hibernate Implementation
UserDetails.java@Entity @Table public class UserDetails { @Id @Column @GeneratedValue(strategy = GenerationType.IDENTITY) private int id; @Column private String name; @Column private String email; @Column private String password; @Column private String address; //getters and settersUserDaoImpl.java
package com.developerstack.dao.impl; import java.util.List; import org.hibernate.Criteria; import org.hibernate.SessionFactory; import org.hibernate.criterion.Restrictions; import org.springframework.beans.factory.annotation.Autowired; import org.springframework.stereotype.Component; import com.developerstack.dao.UserDao; import com.developerstack.model.UserDetails; @Component public class UserDaoImpl implements UserDao { @Autowired private SessionFactory sessionFactory; public ListgetUserDetails() { Criteria criteria = sessionFactory.openSession().createCriteria(UserDetails.class); return criteria.list(); } public UserDetails findUserById(String email) { UserDetails userDetails = null; Criteria criteria = sessionFactory.openSession().createCriteria(UserDetails.class); criteria.add(Restrictions.eq("email", email)); List entityList = criteria.list(); if(!entityList.isEmpty()) { userDetails = entityList.get(0); } return userDetails; } }
Other Controller and model class have usual configurations and similar to whatever we have defined in the previous post.All these are available in the source code which you can download a the end of the post below.
Client Side Implementation
Client side codes are also similar to whatever we have defined in the previous post - Spring security Custom Form Login Example.All these are available in the source code which you can download a the end of the post below.
DB Configurations
Following is the screenshot:

INSERT INTOuserdetails(address,email,name,password)VALUES('Bangalore, Karnataka','johndoe@gmail.com','John Doe','password');INSERT INTOuserdetails(address,email,name,password)VALUES('Chennai, Tamilnadu','amitsingh@yahoo.com','Amit Singh','amit123');INSERT INTOuserdetails(address,email,name,password)VALUES('Chennai, Tamilnadu','prakash.ranjan@yahoo.com','Prakash Ranjan','prakash123');INSERT INTOuserdetails(address,email,name,password)VALUES('Bangalore,Karnataka','bipulkumar@gmail.com','Bipul Kumar','bipul123');
Run Application
1. Run Application.java as a java application.
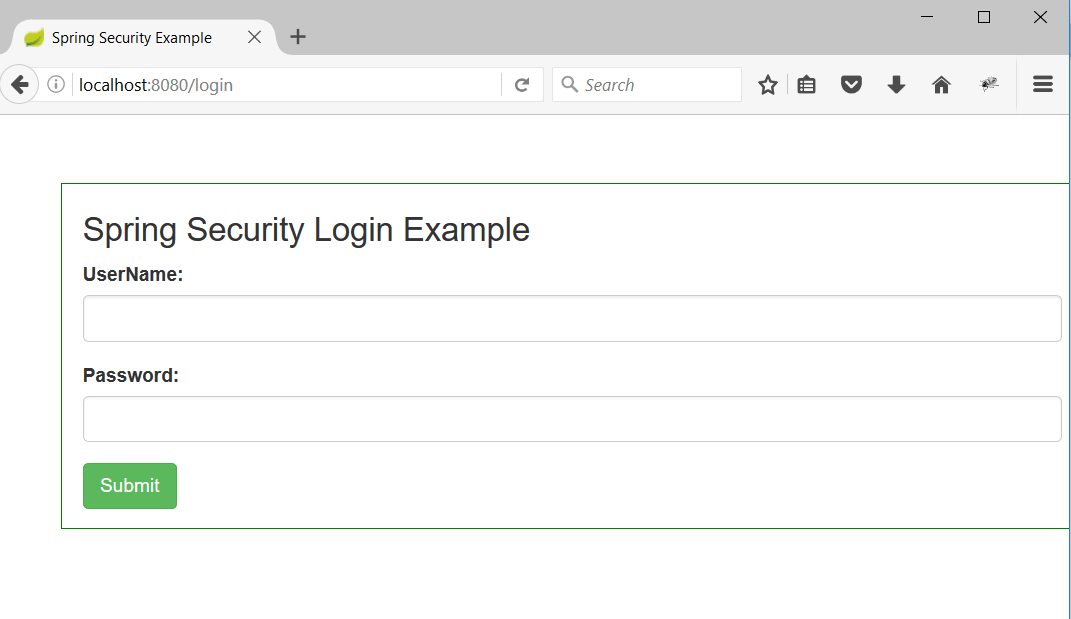
2. Hit the url as http://localhost:8080/dashboard but since the user is not authorised yet, user will be redirected to /login as below

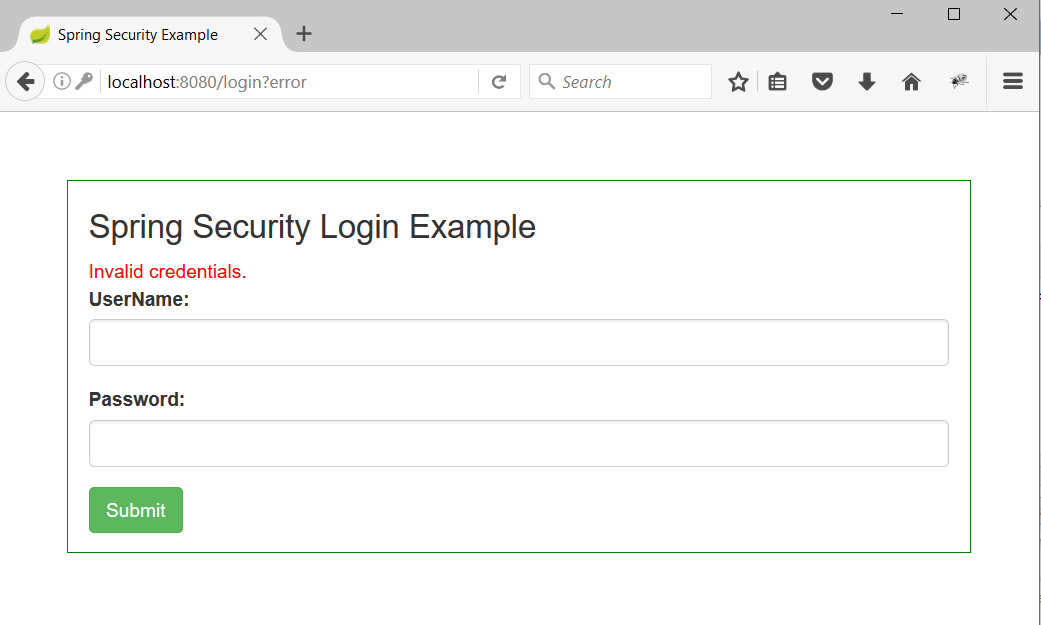
3. Now enter any wrong credentials and we can see an error message as follow. This proves our authentication mechanism is working.

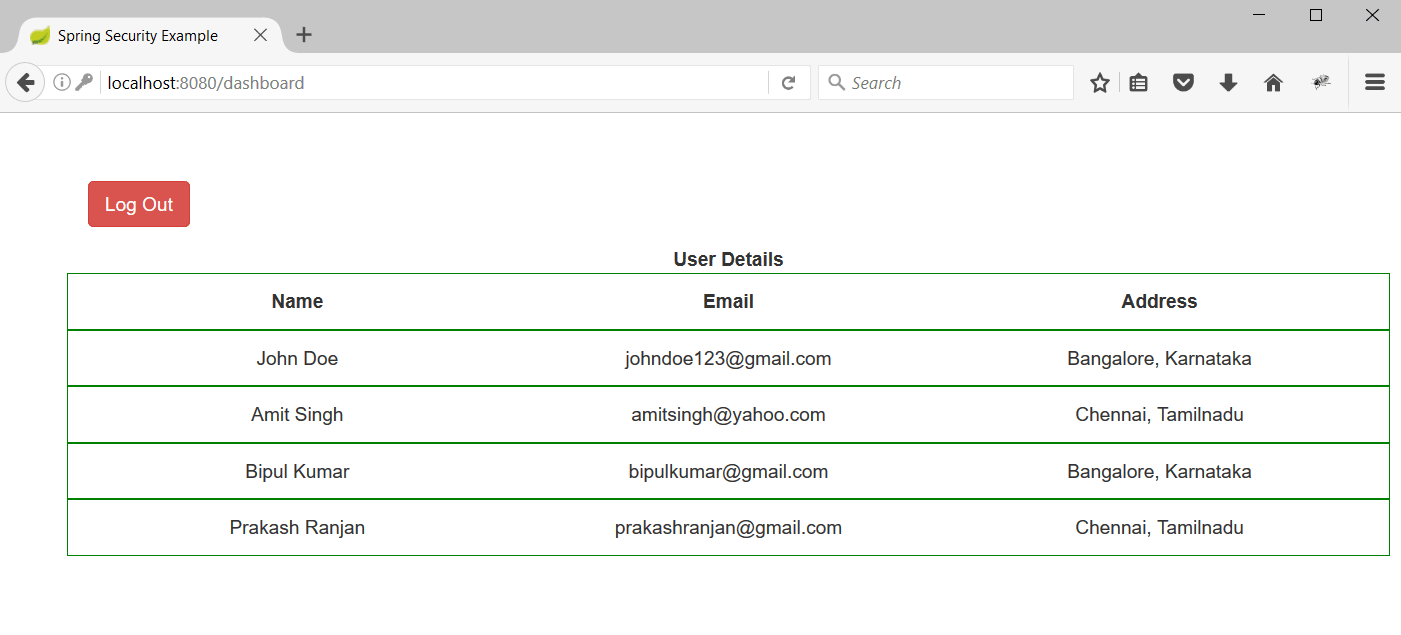
4. Enter the username/password as johndoe@gmail.com/password and hit enter the dashboard page will be rendered.

Conclusion
I hope this article served you that you were looking for. If you have anything that you want to add or share then please share it below in the comment section.


